Something to do with a bumper chili crop

IMG_1544

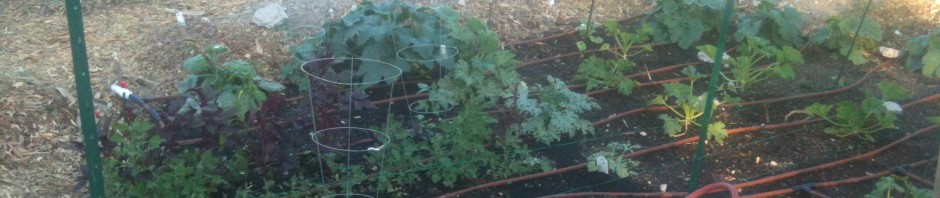
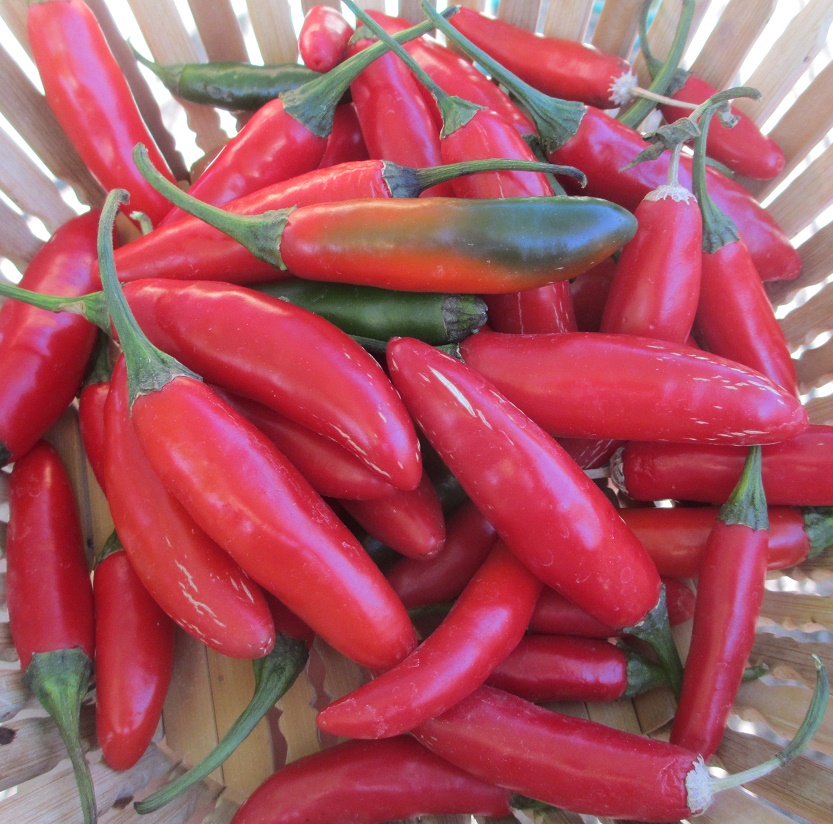
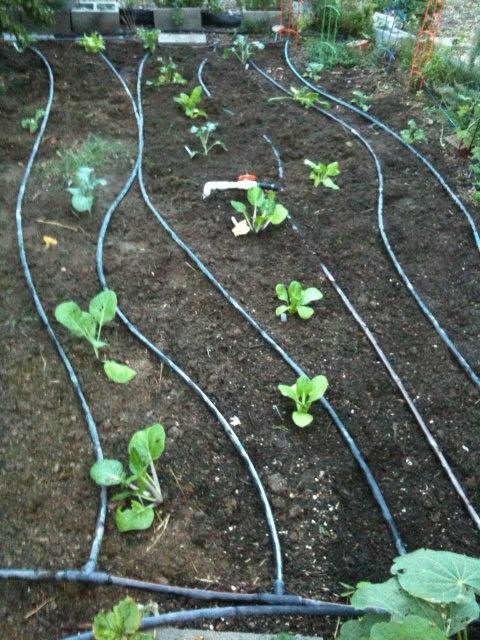
All through the summer I watched as my assorted chili plants struggled to come into their own. At first it looked as if the bugs might get the better of them, with little more than stems leftover after repeated overnight feastings. Then a strange fungus seemed to veil my plants with a sad gray pallor.  All the while my plants clung to life, and my chili loving heart clung to the faint hope of a bountiful crop of red ripe chili peppers some day, the likes of which I’d seen other gardens in the vicinity enjoy.

Well my friends that day has finally come. My plants are now healthy and full of fruit. And the chilis are ripening faster than I can possibly keep up with! I’ve been scrambling for creative ways to use them.

Enter Harissa, a spiced Turkish chili sauce (paste) that is fast becoming all the rage in chili sauce circles. Harissa goes with a lot of things, as a condiment for meats and sandwiches or an additive to soups and stews. Move over Sriracha, there’s a new sauce in town.  And you can make it at home in just five easy steps.

5 Step Harissa Sauce:

  • 2 cups fresh hot red chili peppers (serranos or jalapenos)
  • 1 tsp coriander seeds
  • 1 tsp cumin seeds
  • 1 tsp caraway seeds
  • 3 tbsp olive oil
  • 1 medium red onion, coarsely chopped
  • 6 cloves garlic, coarsely chopped
  • 2 tbsp. tomato paste
  • 1/2 freshly squeezed lemon juice
  • 1 tsp salt

Step one: Roast the chili peppers

IMG_1555

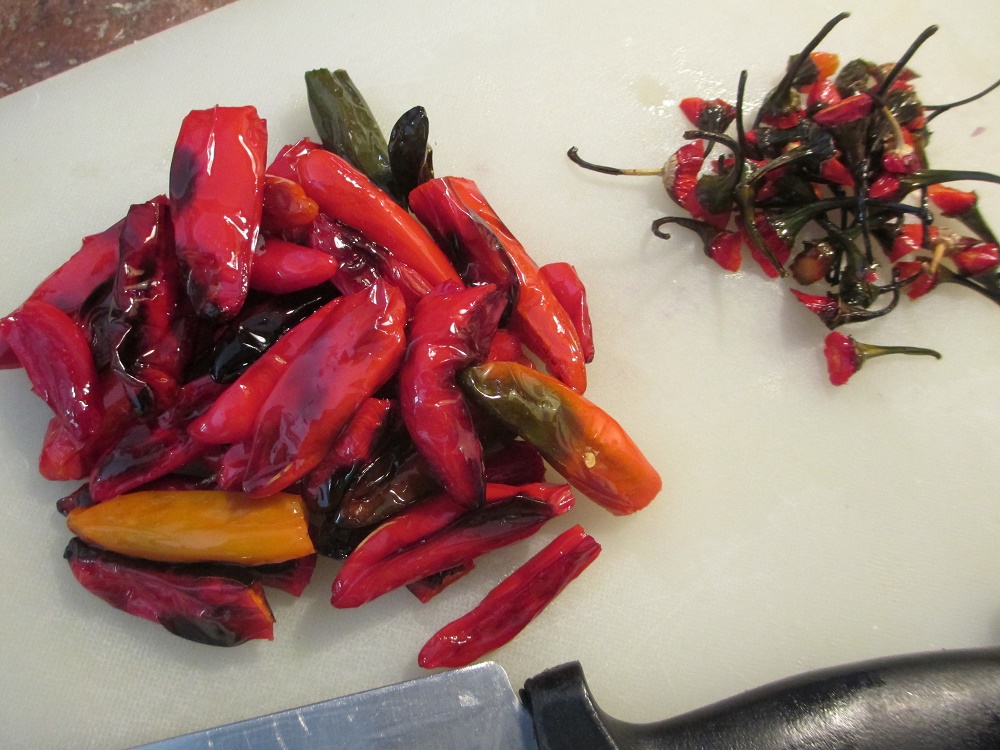
Arrange the whole red chili peppers in a single layer on a roasting pan, lined with foil. Toss chilies lightly with oil and roast in a hot oven until they are slightly charred (less than 10 minutes). Allow to cool, then chop, removing as many of the loose seeds as you are able.

Step 2: Dry roast and grind the spices.

IMG_1552  IMG_1554

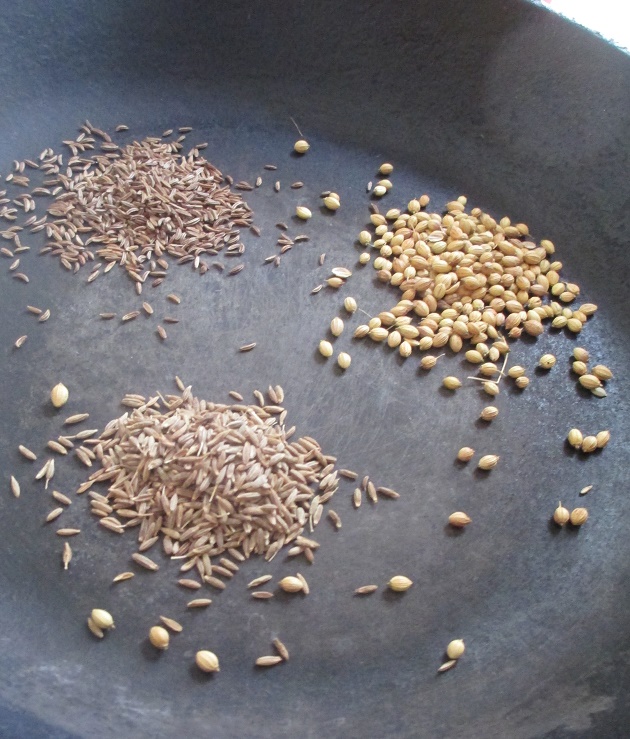
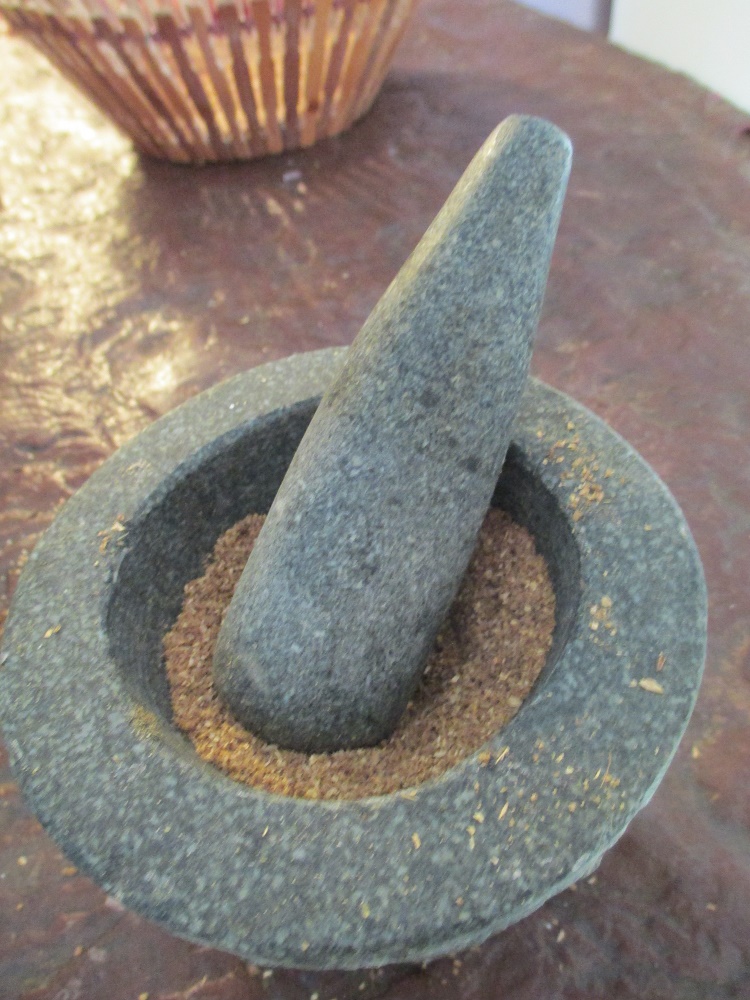
Place a dry frying pan over low heat and lightly toast the coriander, cumin, and caraway seeds for about two minutes or until fragrant. Remove them to a mortar and use a pestle to grind to a powder.

Step 3: Caramelize the veggies

IMG_1553

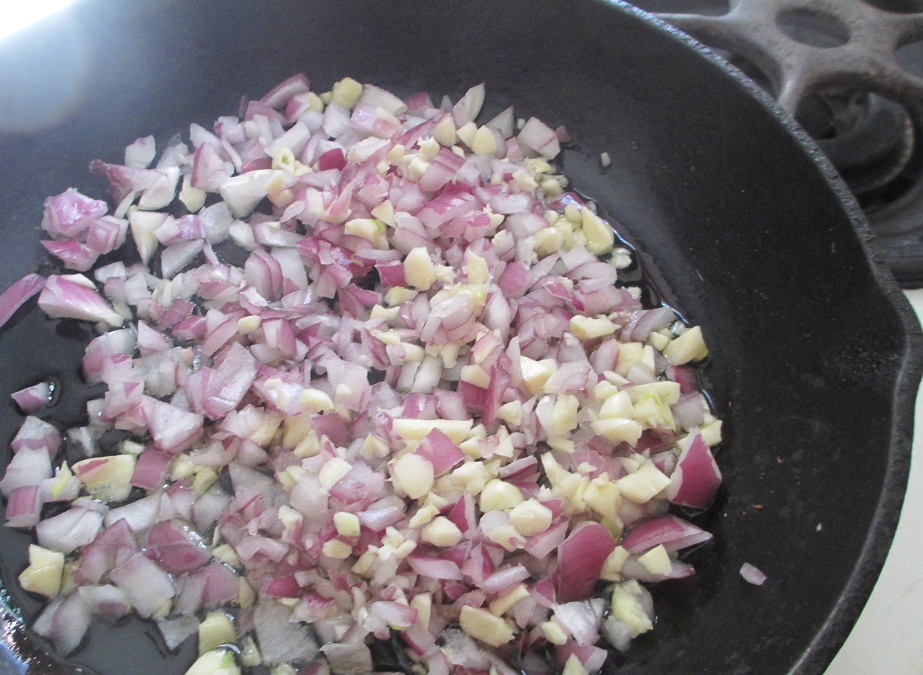
Heat the olive oil in a frying pan over med/low heat, and slowly fry the onions and garlic until almost fully caramelized, approximately 10-12 minutes.

IMG_1556

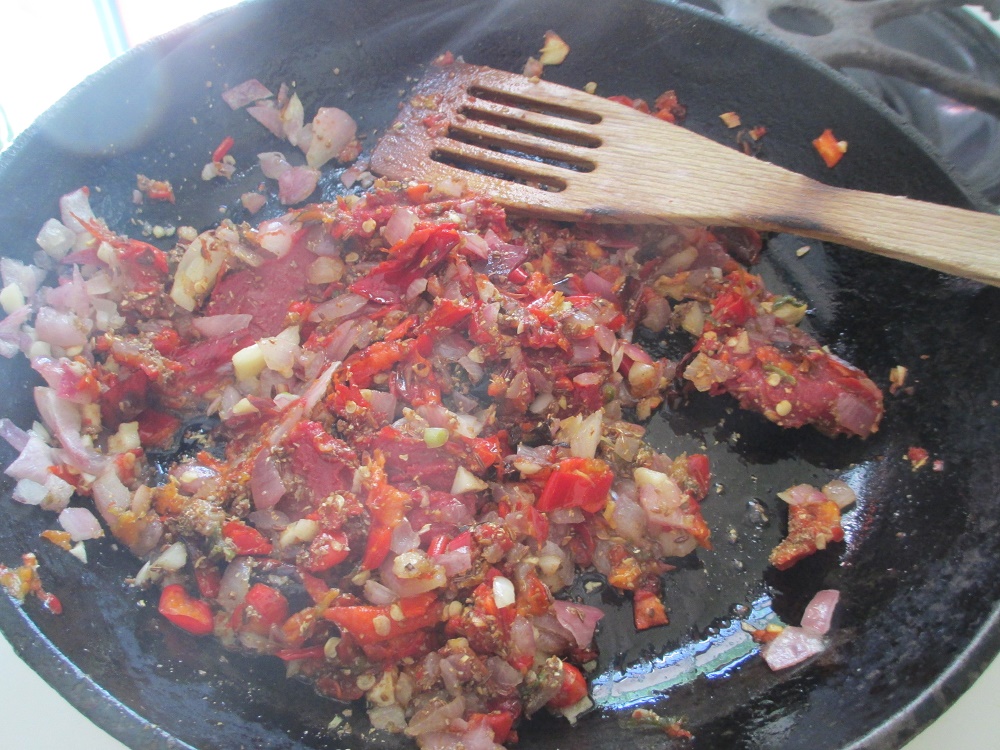
When the onions and garlic are deeply golden, add the ground spices, the chopped roasted red chilies and the tomato pasted to the pan. Continue to mix and fry until the ingredients meld together and the aromas unfold. Allow to cool.

Step 4: Pulverize into a paste

IMG_1562

Use a blender or a food processor to pulverize the paste ingredients until smooth, adding the salt and lemon juice (watch for seeds) to taste, and a little more oil if needed for consistency.

Step 5: Voila!

Store in a sterilized jar in the fridge for up to 2 weeks or even longerIMG_1563

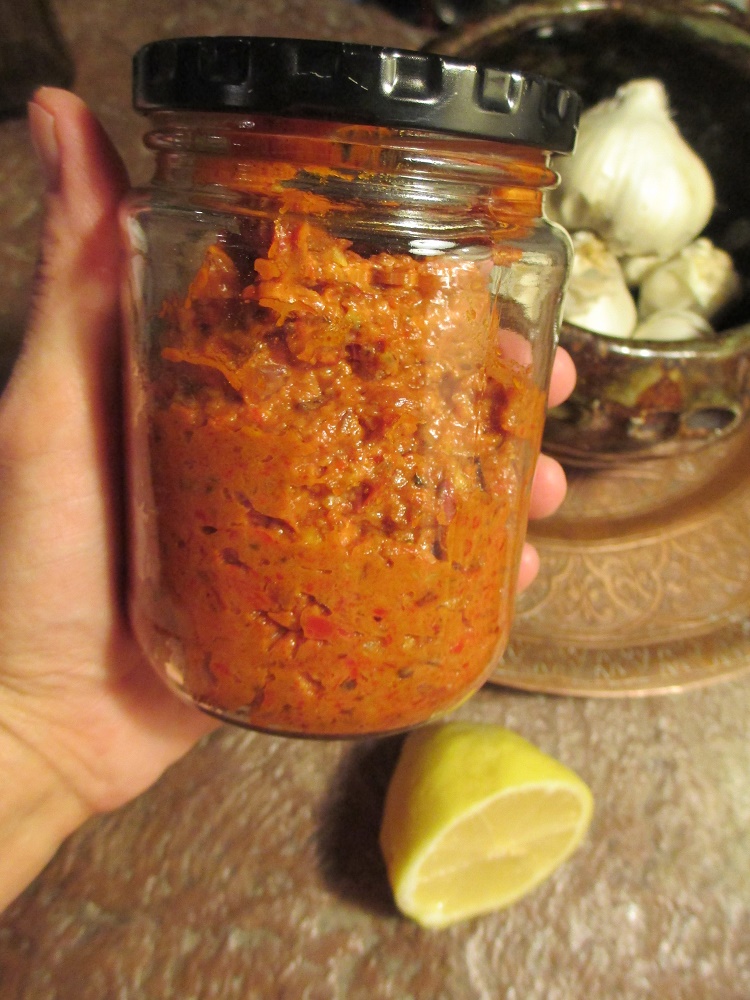
Store in a sterilized jar in the fridge for up to 2 weeks or even longer. I will probably portion some out to freeze as well.
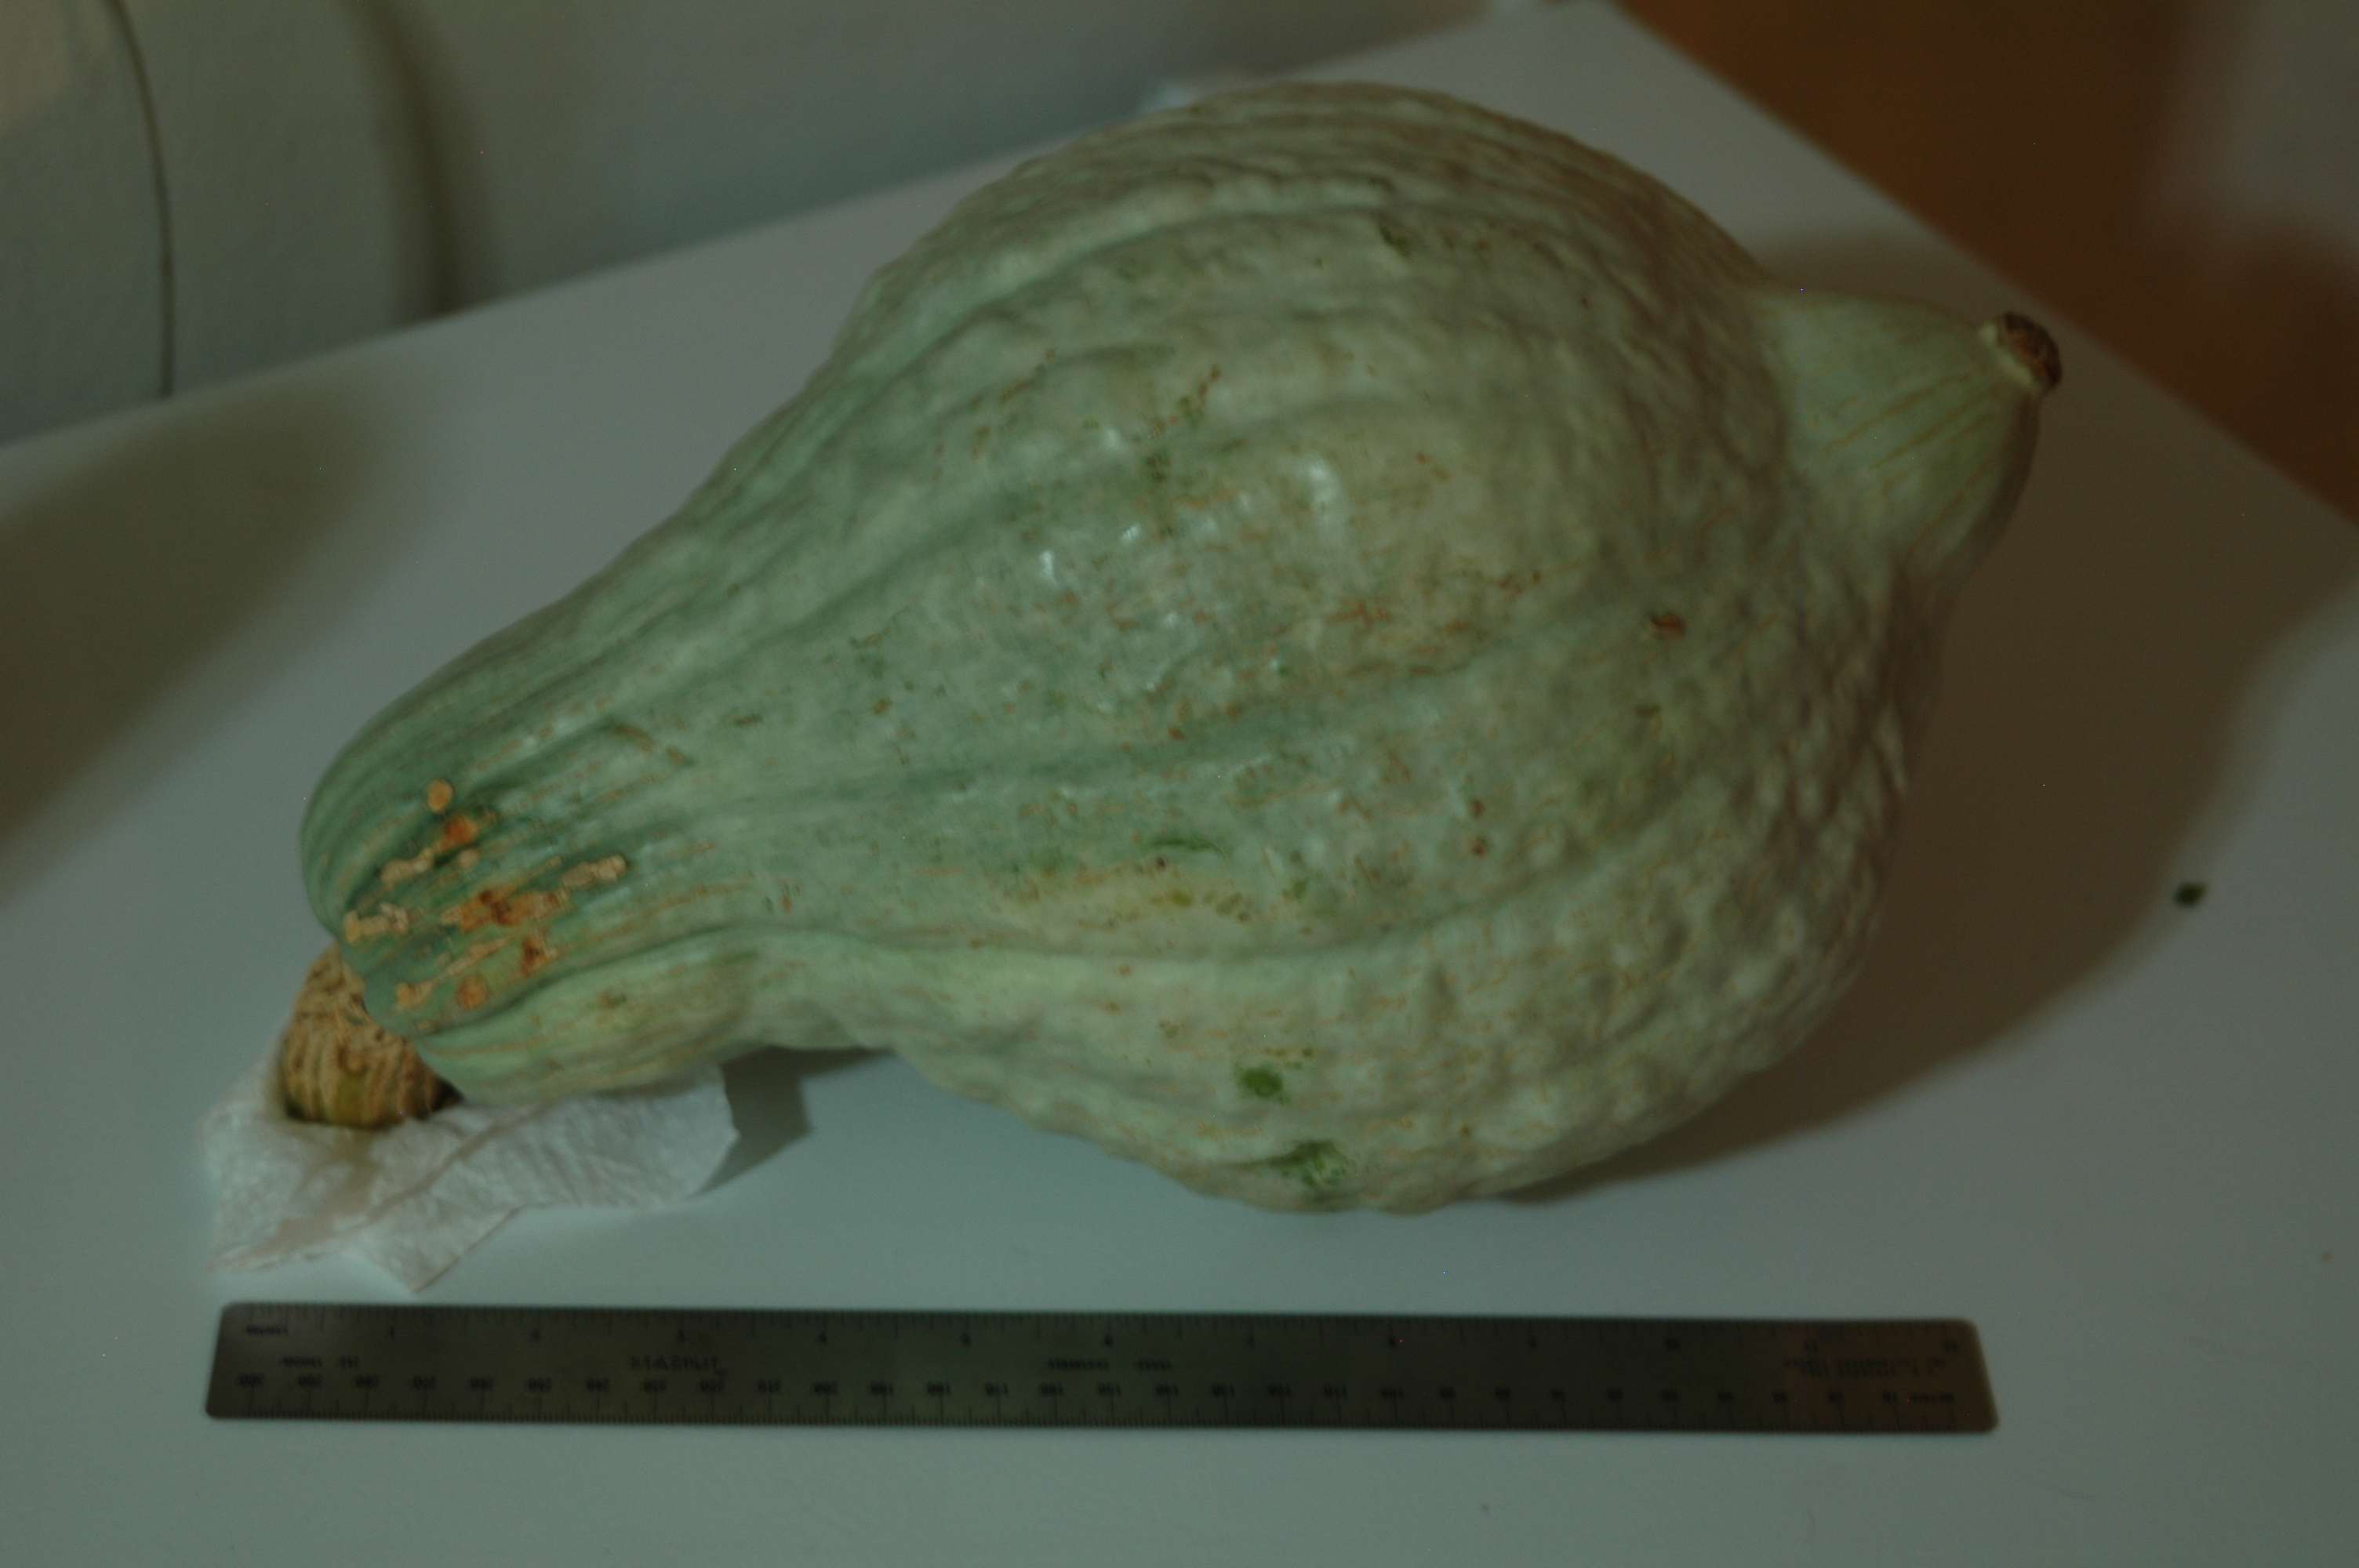
Posted in Uncategorized | Leave a comment

A Trip to the Nursery

We’re finally enjoying temps below 90 degrees and that means it’s time for fall planting.  After a night of storms, it was a great day to head to the nursery

A storm brewing over the Catalina Mtns.

A storm brewing over the Catalina Mtns.

With so many choices, it’s always difficult to decide what to plant; but the years have taught us what works and what doesn’t.  We may really want to plant those brussel sprouts but do we want to deal with the aphids that love to live in those little cabbage balls!

Road Trip! Fall veggies on their way to their new home

Road Trip! Fall veggies on their way to their new home

This year we went with old favs…brocolli, swiss chard, lacanato kale, blue kale, swiss chard, arugula and collard greens.  Until the temps are sure to be in the low 80’s, it’s risky to plant lettuce; but we did try one start, as well as some watercress.

And finally, after four weeks of working on the bed: turning over the soil, adding manure, treating the with bokasi, topping with compost, and hardest of all – sitting back and waiting…it was time to plant!

Fall Vegetable Garden

Fall Vegetable Garden

Posted in Uncategorized | Leave a comment

October Apples

The apple trees at the community garden are early fruit producers. By Mid May the vast majority of apples have fully ripened, and by early June they are pretty much gone. These are are nice sized apples, about the size of medium sized apples you would find at a grocery store. They are quite tasty, sweet and firm. Sort of between a golden delicious and a gala in my estimation. They are good for both eating and baking, and as a great apple enthusiast, it is a rare treat for me to have access to 2 apples trees fully loaded with ripened organic fruit.

The community fruit trees in Pio’s garden have got to be one our biggest perks. Not only do we have apples, but after the apples, come the figs. Then the pomegranates start ripening. The pomegranate trees have just finally wound down to a halt after producing loads of big red juicy fruit. And now we are beginning to enter citrus season. The lemons are just starting to turn yellow and the oranges, while still green, are already sweet and juicy enough to eat, even though they will be much better in a few weeks. And let’s not forget about the glorious peaches and plums that came even before those early apples.

We also have a peculiar phenomenon in mid October, when the apple trees get a surprising second wind. “October apples.” These apples are much smaller than the first crop, in both size and quantity, and as such they are barely even noticeable. The apples are about the size of small limes, like Mexican or Key lime. Or maybe a large walnut would be an apt size comparison. I also call them three bite apples because I can devour them in two or three quick bites. Never mind the cores, they go unnoticed. I love apples so much that every part of them is a treat, including the cores!

That said, I must confess October apples are a bit on the bitter side. Even after they’ve fully blushed, and even still after they’ve become a bit too soft inside, they remain more bitter than sweet. But they are apples! Small, bitter? That’s ok! Apples are apples are apples, especially organic apples, freshly picked off a tree! I rejoice every year when I notice the little October apples making their quiet appearance in the garden.

IMG_1494

Posted in Uncategorized | Leave a comment

Sometimes, during the summer months when the garden demands a lot of attention and the temperatures are in the 100’s, I look longingly towards the winter months when it will be cool and so much fun to spend hours in the garden without worrying about having to bring along gallons of water and gallons of sunscreen.  But then winter inevitably arrives and it’s cold, yes the 50’s are cold for me, and I look at the calendar and wish for the warm days of summer, when I can work outdoors without a parka.  Anyone familiar with the desert climate knows that I do not jest, we seem to bypass the seasons of fall and spring and jump from shorts to scarves in less than a week’s time.  Well, this week was a chilly one, and I only made brief trips to the garden to pick vegetables.  Yesterday I picked snap peas, broccoli, and asian greens for a wonderful stir fry.  Almost every day I can eat a salad out of the garden or pick greens for juicing.

I did snap a picture of the peas that I planted last Saturday and they are doing great?????????????????????????????

And here is the patch of peas that I recently picked from.  I started these last September in the green house and planted them outdoors in November.  I’ve been eating from them pretty regularly for about 4 weeks now.

?????????????????

Posted on by PixieL | Leave a comment

Down and Dirty

This was supposed to be Saturday’s post, but I had technical difficulties.  After tackling the dirt in my garden for four hours, I returned home, only to delete all the pictures from my camera, instead of copying them.  I recovered them, with help, but the process was not completed until after midnight – therefore missing my Saturday post. So, without further ado, here is Saturday’s post….

My planned garden chores were simple: plant my starts of peas and fava beans.  These were started in a greenhouse in the 2nd week of January:

[000262]

This was a simple task.  I had prepared the soil 2 weeks ago so it was just a matter of planting the starts and watering.  I’ll keep you posted but all looks good!

Since it was a cool, drizzly day I decided that I would tackle a tougher task – preparing a row of soil for my summer garden.

[000260]

The crusty, concrete looking rocks are called caliche (“ka-LEE-chay”), and sometimes I feel like it “grows” in my garden.  I searched the definition of caliche and dictionary.com provided a technical definition and then gave the related term of hardpan.  Clicking on “hardpan” gave the following definition, “hard, unbroken ground.”  I couldn’t have said it better myself.

I digress, let’s get back to the task at hand.  I’ve been working on this section for about a month now.  Using a pitchfork to break up this concrete-like substance, I dig down and break up the caliche and add compost to the hole I’ve dug.  I then shift through the soil, pulling out all the caliche, and refill the hole.  When I started working on this section, I could only dig 6 inches before hitting caliche, and now I’m down to about 18 inches – I’m making progress!

If you’d like to read more about our desert soil, click here for a great article from our local Arizona-Sonora Desert Museum.

No Learning Activity today and it is a weekend!


Posted in Soil | Leave a comment

Do you know who your neighbors are?

Many small organic gardens, ours included, make use of a principle called companion planting.  In its simplest form:  some plants complement each other, sometimes by releasing beneficial nutrients into the soil or by helping to repel pests, while others can actually hinder growth or attract undesirable pests.  In the harsh summers of the desert southwest we also use companion planting as a means to provide shade for our gardens.  I have a 6 foot trellis bordering the east end of my plot and will plant native black-eyed peas along its base.  They will grow to cover the trellis, can handle the summer heat, and their blooms will attract bees and moths to the garden.  Bees and moths are “pollinators”, spreading pollen from plant to plant and helping them all grow.

This year I am also going to attempt to grow corn.  Different types of corn pollen will cross-pollinate, check out this article for more information on cross-pollination, so I’ve made sure that none of my neighboring plots are planning on growing corn.  I already have 6 seedlings, and started 6 more today.  In two weeks I am going to start pole beans.  My idea is to plant the corn along the west edge of the garden, two rows, 6 plants in each row.  The height of the corn will shade the squash, and once the ears of corn are harvested I’ll keep the stalks to use as poles for the pole beans to climb.  I hope it works…time will tell.

If you want to read more about companion planting, you can download a free .pdf from the  ATTRA website, or view it here:

Companion Planting: Basic Concepts & Resources

Classroom learning:

Take a look at the table below and then answer the following questions:

Companion planting chart, it is page 2 of the ATTRA document “Companion Planting: Basic Concepts & Resources”, linked above.

1. Do you see any problems with my planting corn with beans to shade squash?

2. How about my cucumber patch, should I plan to plant it next to my herb garden or my sunflowers?

Posted in Plants | Tagged , , | Leave a comment

Decisions, decisions, decisions

Yes, I’m still looking through seed catalogs and deciding what to plant.   It’s not that simple — I know I want squash but what varieties?  The list seems endless, just take a look at the 2014 Native Seed Catalog, it reads like a novelette.  I had some great yields of winter squash last year but not much luck with summer squash, which seemed odd because in 2011 I ran out of recipes for zucchini!  This year I’d like a moderate yield of both.  I’d like to plant the Blue Hubbard again as it was an early producer, and I had squash in July, then the butternuts kicked in and in August we feasted on Butternut Squash Lasagna and Butternut Bisque.  Then the Magdalena Big Cheese squash yield took me all the way to November.  I liked the long harvest season, but I notice that Native Seed SEARCH is no longer selling Blue Hubbard seeds. I may try to use some that I saved from my squash – this can be tricky as squash can cross-pollinate – but it could be fun.

Last year’s Blue Hubbard Squash

DSC_0083

Learning Lesson:

Learn to read a seed packet.  Planting calendars are great to help you plan and ballpark your planting date.  Seed catalogs are another great source of information especially for broad information on a family of vegetables, but nothing beats the seed packet.  It is written  specifically for the variety of vegetable you are going to plant. Let’s take a look:

Cucumber Seed Packet001 Cucumber Seed Packet002

From the front of this package we learn that our Cucumber comes from the Genus: Cucumis and the species: sativus.   We are growing the Spacemaster variety.  It’s a  warm season plant.  What do you think the 62 days mean?  Let’s ask the experts, “If you sow direct, then ‘days’ means days from sowing to harvest. If you grow a transplant, ‘days’ means days from transplant to harvest.”  http://botanicalinterests.com/inthegarden/gardeningcoach/what-does-days-mean-on-my-seed-packet/ .  We also get some valuable information about the plant’s growing habit.  Would this be a good variety of cucumber to grow if we have a small backyard garden?  Remember, changing the variety changes the growing habits.  Garden space is limited, so growing habits are important when deciding what to plant and where to plant it.  Turning to the back of the package we get some planting information.  After reading the package can you answer these questions:

1. If the last frost date in Tucson is March 15 and we plant our seeds two weeks after this date, will we have cucumbers by May 1st?

2. How many seeds are in this package?

Posted in Plants | Tagged , | Leave a comment

Getting ready for February

The last week of every month is always a good time to start looking ahead to what’s on the agenda for the upcoming month.  Taking some time to look ahead now means that you will have time to plan and prepare.  Some tasks give you a little leeway, but seed starting is usually and do-or-die situation, so that’s where I always start my planning.  Let’s see what seeds we need to start in February.  Keeping a garden journal is helpful, but if you don’t have a record of last year’s activity or you are new to gardening, don’t fret – there is plenty of useful information on the web.  Brad Lancaster has a good website with lots of useful information, check out the link to his monthly planting guide here.  The University of Arizona College of Agriculture has an alphabetical listing, and the dates are a little more precise, check out their listing here.

Learning Opportunity:

Don’t just reference the planting guides, take a look at your seed packet.  Some packets give you a US map on the reverse telling you optimal planting dates.  Take a look at this packet of celery seeds.Should we be considering them for our February starts?Celery Seed Packet003 a

Posted in Plants | Tagged , | Leave a comment